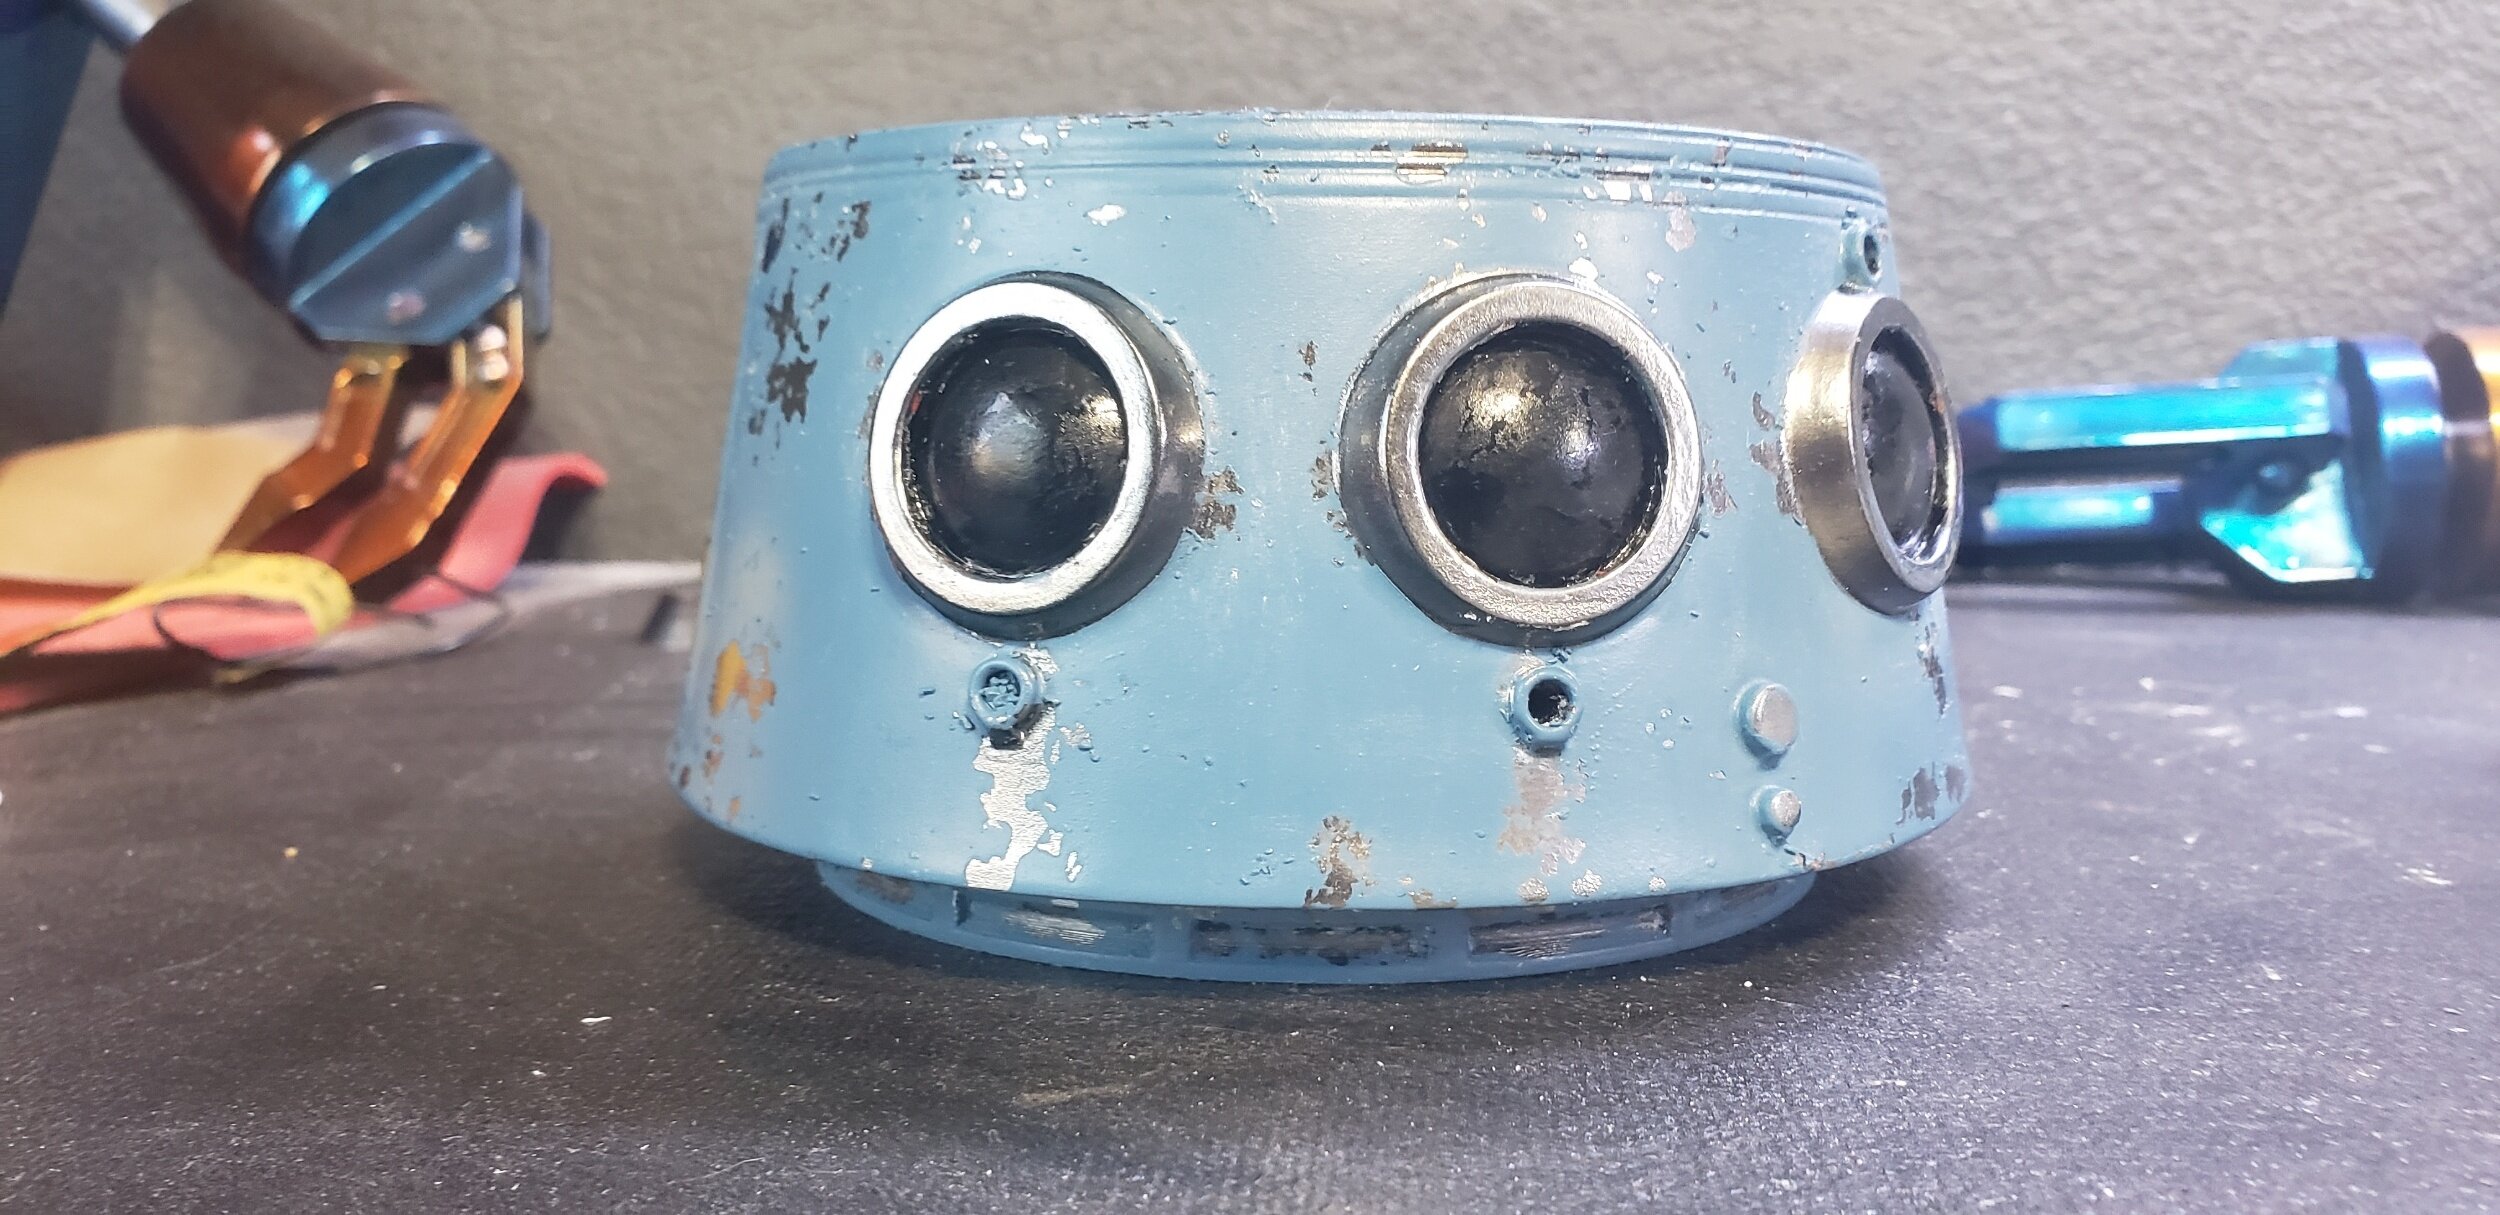
Droid Chipped/Weathered Paint Effect Using Salt
Droid Chipped/Weathered Paint Effect Using Salt
There are several tutorials around the net and You Tube that cover all sorts of weathering techniques. I implemented use of salt to provide a chipped paint look as outlined below. This process is really easy and fun and should take under an hour for small pieces.
Salt Chipped Paint Effect
R5 Baby Droid
Build Info:
R5 Baby Droid model by Mr. Baddeley Printed Droid
FDM finishing process 2 part clear and filler primer
Base Coat Color: Gloss black, topped with Alclad Chrome, topped with 2 layers Alclad Aqua Gloss, topped off with 3 layers of 2 part clear gloss.
Top Color Coat: Montana Gold Mt. Fuji
Base Color
Apply base/bottom color that will show through when top-coat is weathered/chipped off.
For this droid I wanted it to look like it was built out of metal, painted over, and due to wear and tear some paint has chipped off to reveal his metal base coat underneath in some places. To ensure the actual chrome/metal paint didn’t chip off during the weathering process, I did a couple layers of clear coat on top to protect it.
When adding salt to the water in the next steps be aware that the salt will stick to the surface VERY WELL. It will take some heavy brushing in most areas to get the salt off.
So depending on the durability of your base color/paint, there is potential for that layer to chip off as well when you brush off the salt which would expose whatever is under the base color (primer or even bare plastic). If you don’t want that to happen I would recommend sealing your base color with a sealer or clear coat as I did.
Apply Salt
Apply water and then salt to allow it to stick. Apply on in areas where you desire the base color to show through for chipping effect. Allow to dry and shake off stray or excess salt (if desired).
I used a paint brush to apply splashes of water in select areas of the droid and sprinkled Epsom on top of the water droplets. As the water dries the salt will stick incredibly well. Since I clear coated the chrome/metal paint, the water/salt was a little tricky to apply since the surface was really slick and the water and salt slid around. Once the salt is wet it is easy to distribute piles to desired areas and wait for it to dry. Allow the salt to dry out, use a blow dryer on low setting to expedite it if you wish. Shake off the excess salt and make sure it is still stuck in desired areas before top coating. If you are unsure where to put the salt, lookup pictures of rusty metal, chipped paint etc. to get an idea of where to place it.
Apply Top Coat
After the salt is dried, apply your top coat of paint over the salt.
Apply multiple coats of paint depending on how deep a chipping effect you want to achieve.
Brush Off Salt
After the top coat is thoroughly dried, brush off all of the salt to reveal the base coat/chipped effect.
Make sure the top coat is thoroughly dried. You can again use a blow dryer on low to to carefully expedite the drying process. You want to make sure the paint is dry around the patches of salt. I Gave my 3 layers of paint about 15 minutes at 80 F to dry. Once dry, take a stiff brush to brush off the salt patches. Some salt may stick harder than others and you may need to use your finger nail etc. to pick off the excess in some areas. Once the salt is off you should be able to use a damp cloth to wipe off remaining salty residue (depending on your paint) or not if you like it a little grungy looking.


